

Factory Process
Injection molding, fabric cutting, sewing, upholstery, seat-back assembly, armrest fitting, strength testing and final inspection — with the measurable acceptance criterion that applies at every station.
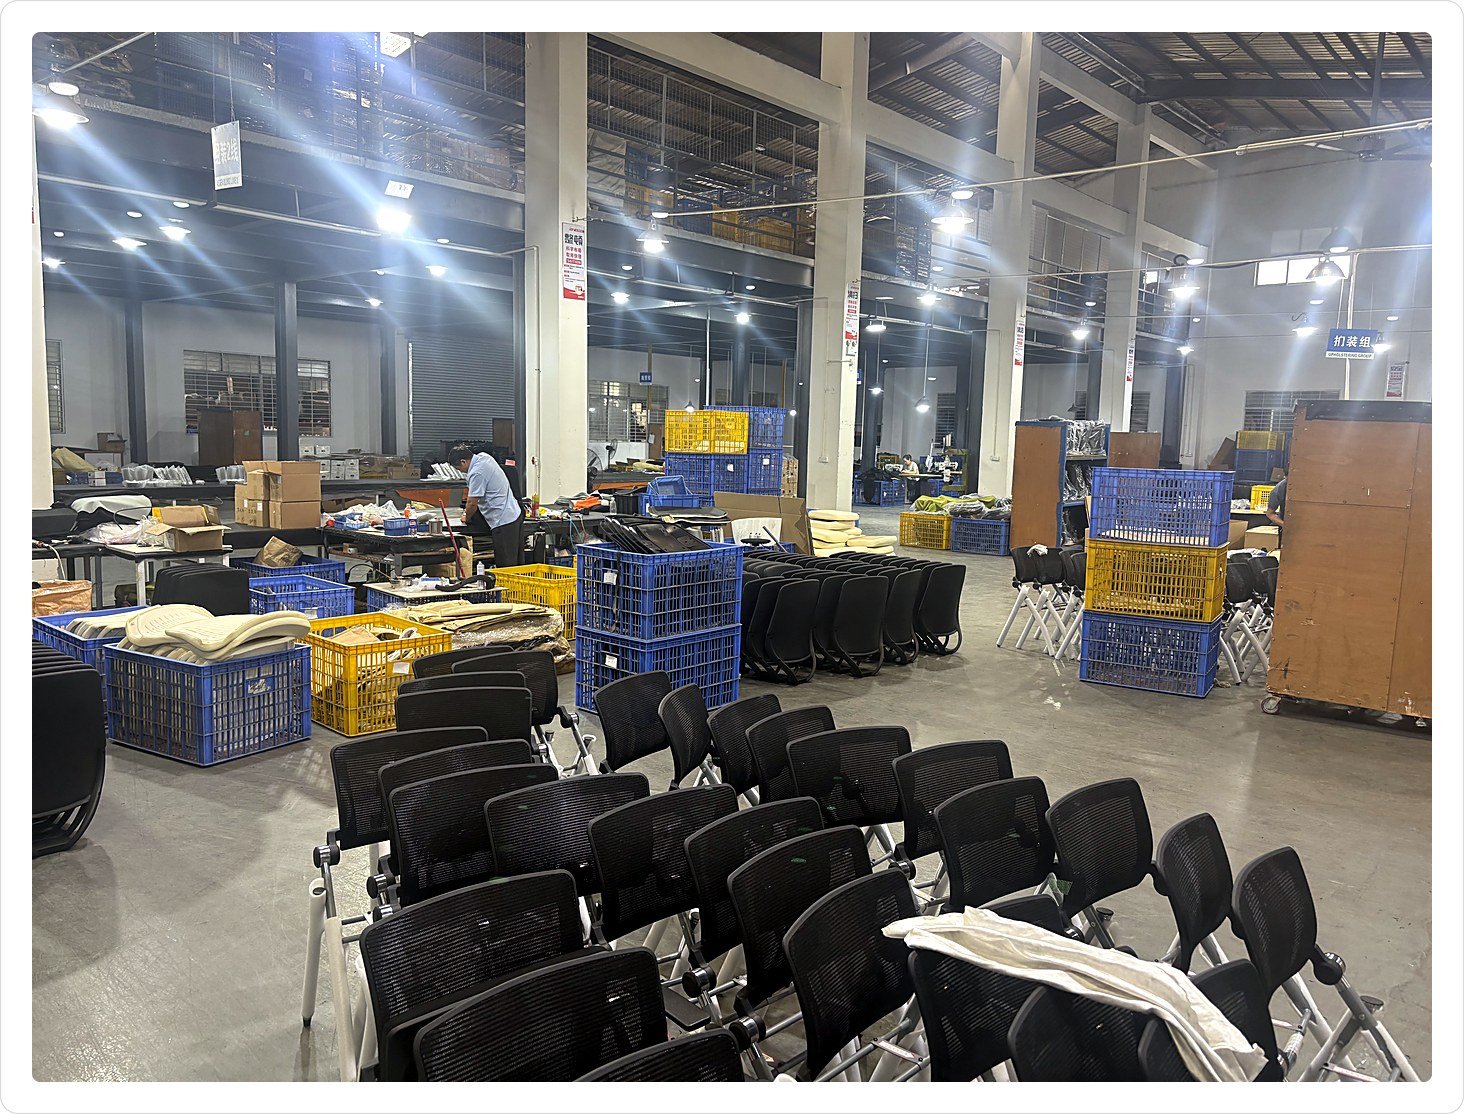
How are office chairs made? Via Furniture is an office chair manufacturer that produces seating from raw material to export carton under one roof — covering injection molding, fabric cutting, sewing, upholstery, seat-back assembly, armrest fitting, strength testing, and final inspection. This guide walks through all ten production stages and the measurable quality gates that apply at each one.
Inside Our Office Chair Factory: Ten Production Stages, One Roof
Where Ten Production Stages Happen Under One Roof
All ten stages of office chair manufacturing run inside the same building, sequenced so that each station hands a verified part to the next: component warehouse, injection molding, fabric cutting, sewing, upholstery, seat-back assembly, armrest and mechanism fitting, strength testing, final inspection, and export packing. Nothing is outsourced mid-stream, which means a defect can be traced back to the station that produced it rather than disappearing into a supplier chain.
Stage 0: Incoming Material Inspection and Warehousing
Incoming material inspection is the stage where delivered components are counted, checked against the sample and released to the line, and it is governed by a fixed sampling rule rather than a judgement call. Our R1 inspection standard requires sampling of 1 pc for shipments under 100 pcs, 2 pcs for 100 to 1,000 pcs, and 4 pcs for shipments above 1,000 pcs — small parts and components with special requirements excepted.
Released parts are then binned and labelled by item, so that plastic shells, fabric rolls, mechanisms, gas lifts and casters are picked against a specific order rather than from an open floor stock.

Quality gate at this stage
- Sampling rate fixed at 1 / 2 / 4 pcs by shipment size.
- Parts that fail the sample are not released to the line.
- Every bin carries an item label tied to the order.
Stage 1: Injection Molding — Back Frames, Seat Shells, and Structural Parts
Injection molding is the stage where molten plastic is formed into back frames, seat shells and structural parts, and it is checked against a gate-trim limit of 5 mm in length and 3 mm in width. The parting line and the gate edge must carry no sharp corners, sharp edges or flash; every gate is trimmed smooth before the part moves on.
Dimensional fit is checked as an assembly, not as a single part. Once the outer and inner back frame are mated, the surface must sit flat to within 1 mm. On the seat shell, the cover may protrude by no more than 0.5 mm and the residual gap must also stay under 0.5 mm.
The most serious defect class at this station is an embedded nut that is missing, incorrectly inserted or installed backwards. In our inspection standard that is a CRI — the highest severity level — because it cannot be corrected downstream without dismantling the part.

Quality gate at this stage
- Gate trim smooth, under 5 mm long and 3 mm wide.
- No sharp edges, sharp corners or flash at the parting line.
- Outer and inner back frame fit flat within 1 mm.
- Seat shell cover protrusion and gap both under 0.5 mm.
- Embedded nuts complete, correctly oriented, no cross-threading (CRI).
Stage 2: Fabric Cutting — Alignment Before Anything Is Sewn
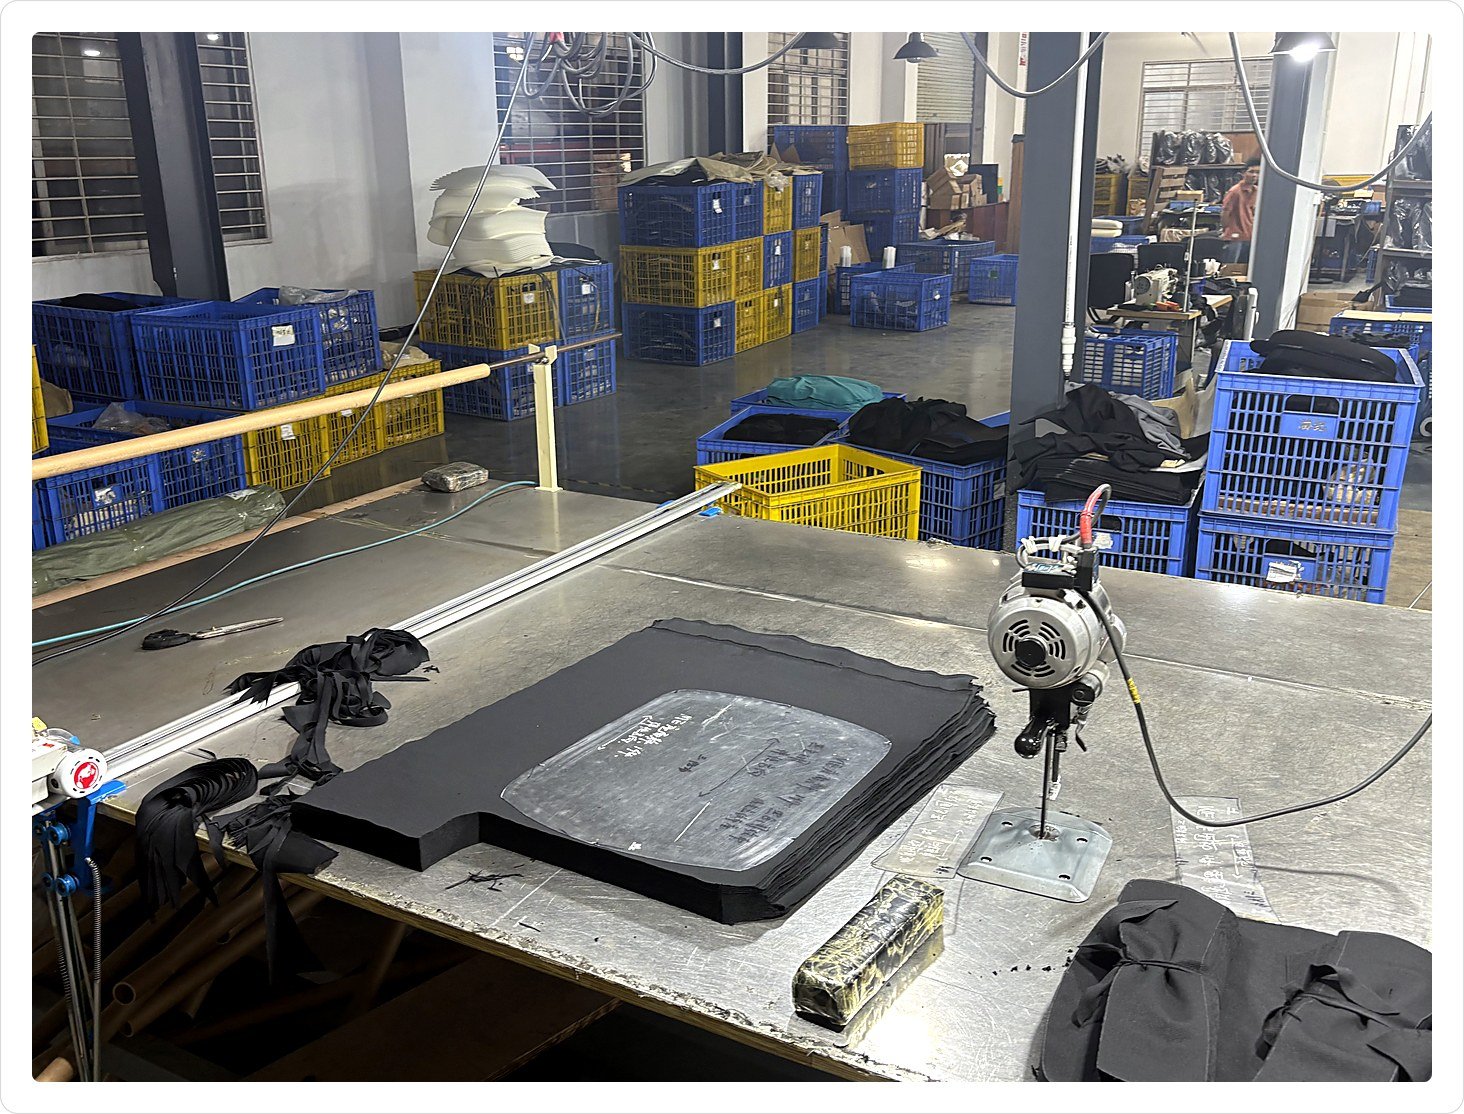
Fabric cutting is the stage where rolls of mesh and woven upholstery are laid out and cut into panels, and it is checked against a skew limit of under 5 mm. The warp and weft of every panel must run straight and level; a panel cut off-grain will pull the seat cover out of symmetry no matter how well it is sewn.
Panels are also inspected for yarn integrity before they leave the table: broken yarn, dropped yarn, coarse yarn and rough scratchy surfaces are all rejected, along with any panel showing scratches, tears or localised weave defects.
Quality gate at this stage
- Warp and weft straight, skew under 5 mm.
- No broken, dropped or coarse yarn; no scratchy surface.
- No scratches, tears or localised weave defects.
Stage 3: Sewing — 7 Stitches per Inch and a 10 mm Seam
Sewing is the stage where cut panels are joined into seat and back covers, and it is checked against a stitch density of 7 stitches per inch with a seam allowance of 10 mm ± 2 mm. Stitch density is what keeps a seam from opening under load, so it is measured with a tape on the finished seam rather than estimated by eye.
The seam line itself must not twist visibly. Runners, skipped stitches and thread breaks are rejected outright, and the panel must not pucker — the operator tests this by pulling the seam apart by hand to confirm the mesh is not stretched over the stitching.

| Station | Parameter | Standard | Verification method |
|---|---|---|---|
| Fabric cutting | Warp and weft skew | Under 5 mm | Visual |
| Sewing | Stitch density | 7 stitches per inch | Tape measure |
| Sewing | Seam allowance | 10 mm ± 2 mm | Tape measure |
| Sewing | Stitch integrity | No skipped stitches, breaks, runners or stretched mesh | Hand-pull test on the seam |
| Upholstery | Mesh height during mounting | 50 mm ± 2 mm | Jig at the backrest curve peak |
| Upholstery | Mesh height after back frame clamping | 35–40 mm | Jig at the backrest curve peak |
Quality gate at this stage
- 7 stitches per inch, measured on the finished seam.
- Seam allowance 10 mm ± 2 mm, no visible twisting.
- No skipped stitches, thread breaks or puckering.
- Mesh confirmed unstretched by hand-pull test.
Stage 4: Upholstery — Mesh Tension, Foam Fit, and Left-Right Symmetry
Upholstery is the stage where mesh and covers are fitted onto the back frame and seat shell, and it is checked against a mounted mesh height of 50 mm ± 2 mm that must settle to 35–40 mm once the back frame is clamped. Height is not eyeballed — the operator measures with a jig at the highest point of the backrest curve, because mesh that is over-tensioned at this step will fatigue early, and mesh that is too loose will sag within months.
On the seat, the cover must be smooth along all four sides with four full corners and no unevenness. The two front corners have to match each other, and the cover’s seam line must be aligned with the edge of the seat foam without twisting — left and right must be symmetrical. The seat foam itself must protrude past the seat shell edge, and it must do so evenly on both sides.

Quality gate at this stage
- Mounted mesh height 50 mm ± 2 mm; 35–40 mm after clamping.
- Seat cover smooth on four sides, four full corners, no unevenness.
- Front corners and left-right symmetry within visual tolerance.
- Seam line aligned with the seat foam edge, no twisting.
- Seat foam protrudes past the shell edge, evenly on both sides.
Stage 5: Seat-Back Assembly — A 0.5 mm Joint Tolerance
Seat-back assembly is the stage where the back frame, seat shell and metal joints are brought together into one structure, and it is checked against a joint gap of 0.5 mm or less. The gap is verified with a feeler gauge, and anything wider is rejected before the chair reaches armrest fitting — it is not reworked after the fact.
Two geometry values are set here and re-measured at final inspection. Back angle, read with an angle gauge, must land between 75.5° and 78.5°. Backrest play at the last adjustment notch must stay under 40 mm (1.57 in); this is the value that separates a chair that feels solid from one that develops a wobble.
Fastening details are controlled as hard requirements rather than preferences. Threads on the fastening screw take AB glue with no omissions; the limit sleeve washer is a fixed quantity of 1 pc, never more and never fewer; washers on both sides of the reinforcement plate are oiled evenly; and joint screws are re-torqued in a trial twist and must not move. Because the seat-back joints and reinforcement plates are high-precision parts, they are 100% inspected against the drawing at goods-in and at machining. The assembled back is finally cycled through all four adjustment positions and must produce no abnormal noise.

Quality gate at this stage
- Joint gap ≤ 0.5 mm, measured with a feeler gauge.
- Back angle 75.5°–78.5°, measured with an angle gauge.
- Backrest play at the last notch under 40 mm.
- AB glue applied to screw threads; washers oiled evenly.
- Limit sleeve washer exactly 1 pc; joint screws tight on trial twist.
- All four adjustment positions cycle without abnormal noise.
Stage 6: Armrest and Mechanism Assembly
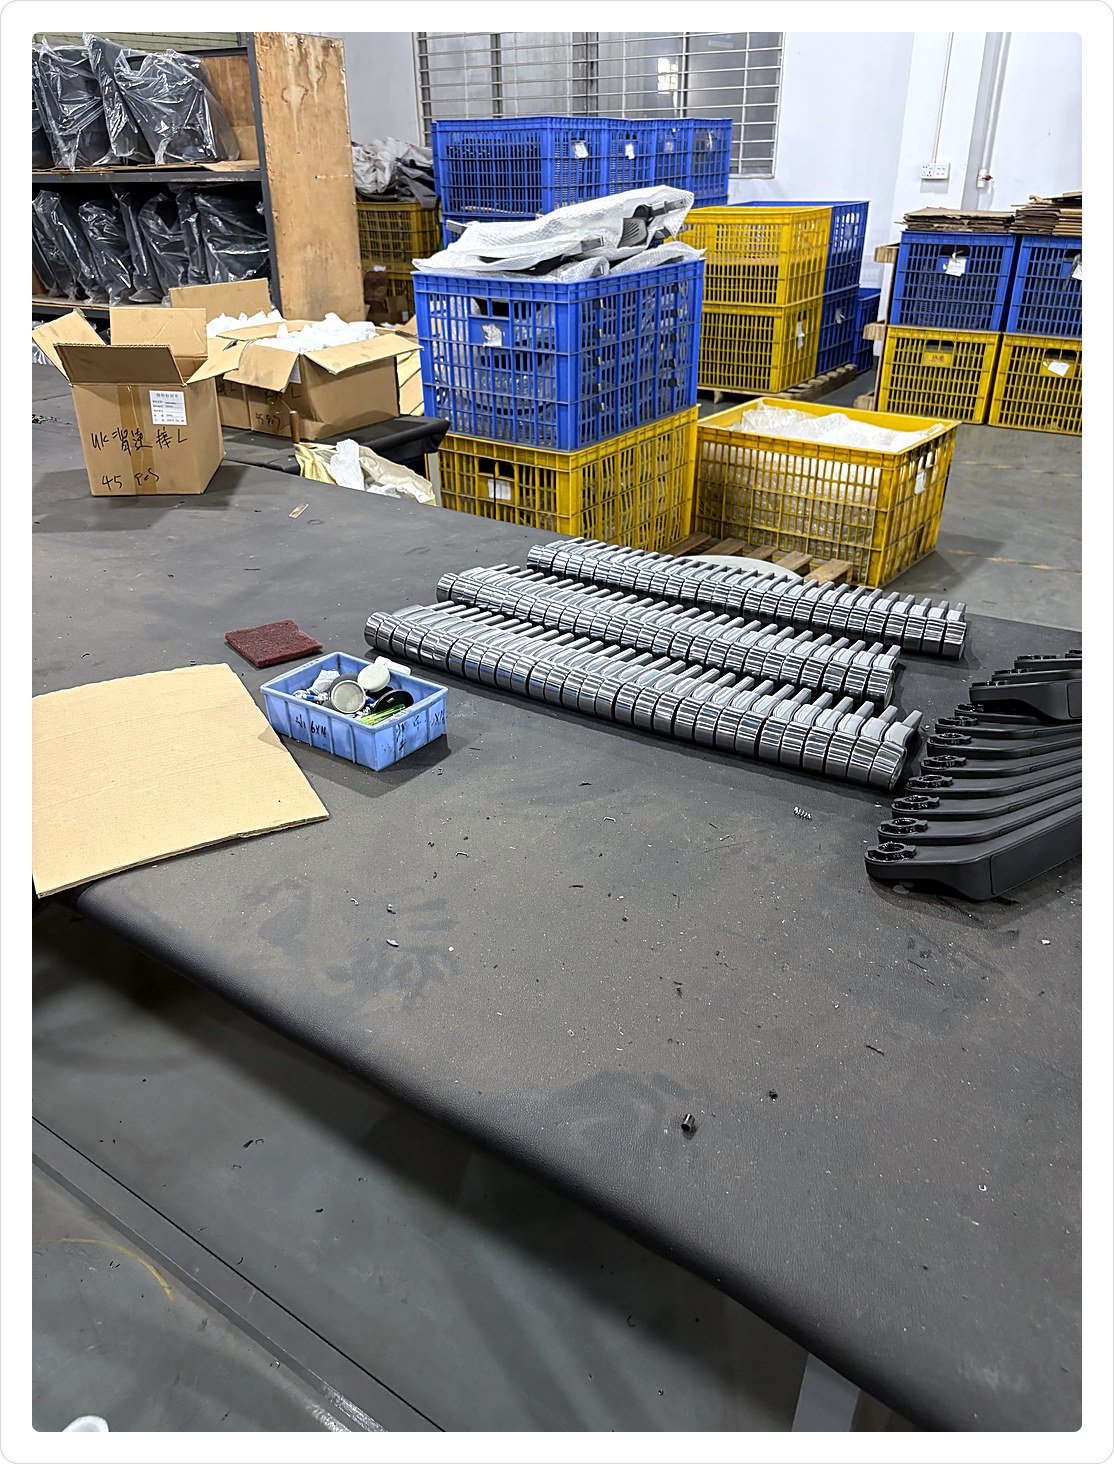
Armrest and mechanism assembly is the stage where the armrests, tilt mechanism, gas lift and base are fitted to the assembled seat and back, and it is checked against an armrest cap gap of 1 mm or less and a mechanism handle free play of 2–4 mm.
Armrest Assembly Quality Gates
The PU armrest cap and the upper armrest cap must close to within 1 mm. The moulded seam is trimmed to a width of under 0.5 mm, and it must be smooth — not scratchy to the hand and not left untrimmed. Left and right PU caps have to feel the same; a noticeable difference in hardness between two caps on the same chair is a defect. Fixing screws take AB glue, sliding plates are oiled evenly, and none of these may be skipped.
The armrest body is then trial-fitted into the seat shell hole: it must assemble without force and must not wobble beyond the sample tolerance. Lift and slide tightness is matched left to right before the PU cap is fitted, because adjusting it later is not possible without disassembly.
Mechanism, Gas Lift, and Base Fitting
At the mechanism, the swivel cup is turned to the mid-point of its travel, the control handle is set to a free play of 2–4 mm, and the cone bore is oiled evenly with no dry spots. On the woodworking side of the same line, hole positions are verified with a hole-alignment jig so they cannot be skewed or offset, and every embedded nut is checked with a mating screw for missing, reversed, cross-threaded or threadless inserts.
Quality gate at this stage
- PU cap gap ≤ 1 mm; seam trim line under 0.5 mm and smooth.
- Left and right PU caps match in hardness.
- Armrest fits the seat shell hole with no excessive wobble.
- Mechanism handle free play 2–4 mm; swivel cup at mid-travel.
- Cone bore oiled evenly; embedded nuts verified with a mating screw.
Stage 7: Strength and Fatigue Testing — What We Measure and Why
Strength and fatigue testing is the stage where finished chairs are loaded and cycled on purpose-built rigs, and it is judged against a two-level acceptance rule. Our office chairs are independently tested by SGS against ANSI/BIFMA X5.1 — General-Purpose Office Chairs: Tests (BIFMA standard overview).
The acceptance logic is what buyers should look at. At the first load level, both function and structure must remain normal. At the higher load level, functional abnormality is permitted but structural change is not — and the change in back angle is capped in degrees so that “no structural change” is a measurement rather than an opinion.

Table 2 — Office chair strength and fatigue tests we run on every batch.
| Test | Load or cycles | Acceptance criterion |
|---|---|---|
| Back pull strength | 200 lb (90.7 kg), 1 min | Function normal, no structural change, back angle change under 2° |
| Back pull strength — higher load | 300 lb (136.1 kg), 1 min | Function abnormality permitted; no structural change; back angle change under 5° |
| Armrest vertical strength | 200 lb (90.7 kg), 1 min | Function normal, no structural change |
| Armrest vertical strength — higher load | 300 lb (136.1 kg), 1 min | Function abnormality permitted; no structural change |
| Armrest horizontal strength | 100 lb (45.4 kg), 1 min | Function normal, no structural change |
| Armrest horizontal strength — higher load | 150 lb (68.0 kg), 1 min | Function abnormality permitted; no structural change |
| Back joint fatigue | 100 lb (45.4 kg), 50,000 cycles | Joint screws stay tight; joint gap change under 1 mm |
| Switch fatigue (test jig) | 50,000 cycles | Switch returns to position after testing |
| Back fatigue — pull | 100 lb (45.4 kg), 60,000 cycles | Joint screws stay tight; joint gap change under 1 mm |
| Fatigue impact | 100 lb (45.4 kg), 100,000 cycles | Gas lift still rises and lowers on its own; no loss of structural function |
| Whole-chair impact, gas lift at highest and lowest position | 225 lb (102.1 kg) drop, 1× | Function must remain normal |
| Whole-chair impact — higher load | 300 lb (136.1 kg) drop, 1× | Function abnormality permitted; no structural change |
Beyond these eight test items and their two load levels, remaining test items follow ANSI/BIFMA X5.1 protocols as well.
Quality gate at this stage
- 200 lb back pull held one minute with under 2° angle change.
- 300 lb back pull with no structural change.
- Back joint fatigue 50,000 cycles with under 1 mm gap change.
- Fatigue impact 100,000 cycles with the gas lift still functioning.
- Whole-chair drop test at 225 lb with normal function.
Stage 8: Final Inspection — 17 Dimensional Checks on Every Batch
Final inspection is the stage where the assembled chair is measured and function-tested before it is allowed into a carton, and it is run as a sampling inspection using assembly checks, visual checks, angle gauges, calipers and tape measures. Appearance and assembly come first: the seat shell and chair legs must be free of damage and scratches, and the protective cover on the mechanism must not be loose or missing.
Structure and function are then exercised on the chair itself — the gas lift must rise and lower smoothly, the recline function must work, the mechanism must run 100 tilt cycles with no abnormal noise, all four lock positions must engage, the casters must roll the chair in a straight line without noise, and the tightness of the backrest fore-and-aft adjustment must match the approved sample.
The batch is then measured against 17 printed dimensions. The values below are the acceptance targets from our R1 inspection standard, measured on the fully assembled chair.
| # | Measurement | Standard | Tolerance |
|---|---|---|---|
| 1 | Armrest verticality | 86.5°–89° | — |
| 2 | Mechanism recline angle | 17.5°–20° | — |
| 3 | Backrest mesh height | 35–40 mm | — |
| 4 | Backrest play at last notch | Under 40 mm (1.57 in) | — |
| 5 | Armrest wobble, front/back and left/right | ± 1.5 mm | — |
| 6 | Back angle | 75.5°–78.5° | — |
| 7 | Back rotation joint gap | Within 0.5 mm | — |
| 8 | Overall chair height | 885–1,000 mm (34.8–39.4 in) | ± 5 mm |
| 9 | Seat height | 420–535 mm (16.5–21.1 in) | ± 5 mm |
| 10 | Armrest height | 610–670 mm (24.0–26.4 in) | ± 5 mm |
| 11 | Armrest inner width | 400–490 mm (15.7–19.3 in) | ± 5 mm |
| 12 | Seat depth | 440 mm (17.3 in) | ± 10 mm |
| 13 | Gas lift ground clearance | 40 mm (1.57 in) | ± 5 mm |
| 14 | Chair width | 650 mm (25.6 in) | ± 5 mm |
| 15 | Chair depth | 570 mm (22.4 in) | ± 5 mm |
| 16 | Seat cushion reference size | 490 × 470 mm | ± 5 mm |
| 17 | Backrest reference size | 445 × 440 mm | ± 5 mm |
Packing protection is proven separately: the packed product is dropped per the product drop-test requirement, and a chair that survives the drop without functional damage is accepted.
Every finding at this stage is graded, so that a buyer knows exactly which issues stop a shipment. Our standard uses three severity levels:
| Class | Meaning | Examples from our standard |
|---|---|---|
| CRI | Critical — the batch is not accepted | Embedded nut missing, wrong or reversed; parts missing, wrong or reversed at final assembly; whole-chair dimensional or function check failed; any strength test failed |
| MAJ | Major — must be corrected before packing | Seat shell cover protrusion or gap out of tolerance; back frame gate or fit out of tolerance; armrest cap gap over 1 mm; seat-back joint gap over 0.5 mm |
| MIN | Minor — cosmetic or documentation | Mesh or fabric weave skew over 5 mm; label print quality; surface soiling on a part that can be cleaned |
Quality gate at this stage
- All 17 dimensions inside the printed tolerance.
- 100 tilt cycles with no abnormal noise from the mechanism.
- Four lock positions engage; casters roll straight and silently.
- Seat shell, legs and mechanism cover free of damage and scratches.
- Packed product passes the drop test.
Stage 9: Packing, Drop Testing, and Export Carton Loading
Packing is the stage where the chair is broken down into its shipping configuration, protected and closed into an export carton, and it is checked against three things: correct contents, correct protection, and sound cartons. Every part, accessory, carton and shipping mark is cross-checked against the order before the box is closed, and no missing, wrong or reversed component or protective material is accepted.
Carton condition is graded just as strictly — a carton that is damaged, deformed, visibly soiled or damp is rejected, because a compromised outer box is the most common cause of transit damage on long sea routes. For container loading, carton counts and shipping marks are reconciled against the packing list so that the marks on the box a buyer receives still tie back to the order they placed.

Quality gate at this stage
- Parts, accessories and shipping marks match the order.
- All protective packing materials present, none substituted.
- Carton free of damage, deformation, heavy soiling and moisture.
- Drop test passed on the packed configuration.
Parts, Accessories, and Replacement Support
We keep a sample display area where mechanisms, armrests, casters and other components are mounted on boards as physical reference samples. Those boards do two jobs: they let an incoming delivery be compared against the approved part rather than against a photograph, and they let us match a replacement component to a chair that was produced years earlier — which is what makes after-sales spare-part support possible rather than theoretical.
How We Work With Overseas Buyers
Verifying an office chair factory is a documentation exercise, not a photo exercise. When you evaluate a supplier, ask for the in-process inspection criteria used at each station, the strength and fatigue test records for the model you are ordering, and confirmation that the tooling is held in-house. A trading company can send you finished-product images; a factory can send you the stage-by-stage criteria and the test data behind them.
The working sequence is straightforward. We produce a sample first, and once you approve it, that sample becomes the reference standard for the production run — which is why so many of the criteria above are written as “per the approved sample”. Custom work covers the fabric and mesh selection, the mechanism and gas lift grade, and the carton and shipping-mark artwork. We support third-party inspection during production and before loading, and we will release inspection records for the batch on request. Pricing for custom configurations is quoted per drawing and material specification, because tooling, fabric consumption and mechanism grade move the number more than any factory-wide rate would.
Frequently Asked Questions About Office Chair Manufacturing
How are office chairs made?
An office chair is built in ten stages: incoming material inspection, injection molding, fabric cutting, sewing, upholstery, seat-back assembly, armrest and mechanism fitting, strength and fatigue testing, final dimensional inspection, and export packing. Each stage has its own measurable acceptance criteria — for example, the seat-back joint gap must be 0.5 mm or less.
How many stages are there in office chair manufacturing?
Ten. We run ten stages under one roof, starting with incoming material inspection and ending with drop-tested export packing.
What materials are used to make an office chair?
Engineering plastic for the back frame, seat shell and armrest body; mesh or woven fabric; seat foam; metal joints and reinforcement plates; a gas lift; casters; and PU armrest caps.
How long does it take to manufacture an office chair?
Production time depends on the number of orders in queue, the mechanism and fabric selected, and whether tooling already exists. The testing portion is measurable: a back pull test applies 200 lb (90.7 kg) for one full minute, back joint fatigue runs 50,000 cycles, and fatigue impact runs 100,000 cycles.
What is BIFMA X5.1 testing?
ANSI/BIFMA X5.1 is the test standard for general-purpose office chairs published by BIFMA, the Business and Institutional Furniture Manufacturers Association. Our office chairs are independently tested by SGS against ANSI/BIFMA X5.1.
What strength tests do you run on an office chair?
We run back pull strength tests at 200 lb (90.7 kg) and 300 lb (136.1 kg), armrest vertical strength tests at 200 lb and 300 lb, and armrest horizontal strength tests at 100 lb (45.4 kg) and 150 lb (68.0 kg), each held for one minute, plus joint, switch, back and impact fatigue tests of 50,000 to 100,000 cycles.
How many cycles does the back joint fatigue test run?
50,000 cycles at 100 lb (45.4 kg). The acceptance criterion is that the joint screws stay tight and the joint gap changes by less than 1 mm.
What is the standard seat height range for an office chair?
Our inspection standard sets seat height at 420-535 mm (16.5-21.1 in) with a tolerance of plus or minus 5 mm, measured on the fully assembled chair.
Why does my office chair backrest wobble?
Backrest wobble usually comes from two places: play inside the seat-back rotation joint, or excessive backrest play at the last adjustment notch. Our factory criteria are a joint gap of 0.5 mm or less and backrest play under 40 mm at the last notch.
How is fabric cut and sewn for office chairs?
Fabric is cut with the warp and weft kept straight and skew held under 5 mm, then sewn at a density of 7 stitches per inch with a seam allowance of 10 mm plus or minus 2 mm. Skipped stitches, thread breaks and tension lines are rejected.
What does injection molding do in office chair production?
Injection molding forms the back frame, seat shell and structural plastic parts. On the back frame, gate trim must be under 5 mm long and 3 mm wide, with no sharp edges or flash, and the outer and inner frames must fit flat within 1 mm.
How are office chairs packed for container shipping?
Every carton is checked for correct parts, accessories and shipping marks; protective packing materials must all be present; and the carton must be free of damage, deformation, heavy soiling and moisture. Packing protection is then validated with a drop test before shipment.
How do I inspect an office chair shipment before it ships?
Final inspection covers appearance, assembly, 17 dimensional checks taken with angle gauges, calipers and tape measures, and structure-and-function checks such as 100 tilt cycles with no abnormal noise and casters that roll in a straight line. It is a sampling inspection, and the packed product also goes through a drop test.
What is your MOQ for custom office chairs?
MOQ depends on the tooling, fabric and mechanism configuration for your project, so it is quoted per drawing and material specification rather than fixed as one factory-wide number. Send us your drawing and target configuration and we will confirm it for your project.
How much does it cost to produce a custom office chair?
Cost is built from tooling and molded plastic parts, fabric consumption and sewing labour, the grade of mechanism and gas lift, and packing and shipping-mark requirements. Because these vary by configuration, we quote per drawing and material specification instead of publishing a single unit price.
Can I get a sample before mass production?
Yes. Samples are produced before mass production, and the approved sample becomes the reference standard for the production run. Most of our inspection criteria are measured against that approved sample.
What is the difference between a trading company and an office chair factory?
A factory runs the production stages itself, so it can show you in-process inspection records, strength and fatigue test data, and its own tooling. A trading company typically sources finished goods and cannot provide in-process data. When evaluating a supplier, ask for stage-by-stage inspection criteria and strength test results, not only finished-product photos.
How do you control quality during production, not just at the end?
Quality control runs at three levels: in-process inspection at every station, sampling inspection of the finished chair, and strength and fatigue testing. For example, the seat-back joint gap is checked at the assembly station itself, before the chair reaches armrest fitting, rather than being deferred to final inspection.
Key Takeaways
- Ten stages run under one roof, from incoming material inspection through to drop-tested export packing.
- 0.5 mm is the maximum seat-back joint gap — checked at the assembly station, not deferred to final inspection.
- 10 mm ± 2 mm seam allowance at 7 stitches per inch, with warp and weft skew held under 5 mm.
- 75.5°–78.5° back angle and backrest play under 40 mm at the last adjustment notch.
- 200 lb / 300 lb back pull tests, and fatigue testing of 50,000 to 100,000 cycles — higher load permits a functional fault but never a structural change.
Want the specifications behind these numbers?
We can send you the in-process inspection criteria and the strength and fatigue test records for the model you are evaluating, alongside the chair drawings and dimensions. If you are sourcing a custom office chair programme, send us your drawing and target configuration and we will come back with a quotation against the material specification.
Inspection criteria and dimensional tolerances in this article are quoted from the Via Furniture office chair finished-goods inspection standard (R1 revision). Strength tests on our office chairs are carried out by SGS against ANSI/BIFMA X5.1 General-Purpose Office Chairs — Tests; see the BIFMA standard overview.

